192.168.0.1 - Login Admin
The IP address 192.168.0.1, which is sometimes mistakenly written as 192.168.o.1, is typically used as a gateway address for popular routers, such as TP-Link, D-Link, and NETGEAR, to access their admin homepage.
When you reach the login panel, you can simply handle the router settings. Whether changing the wifi password, managing connected devices, filtering MAC addresses, enhancing security settings, or customizing premium options. To do this, it is necessary first to know how to access 192.168.0.1 in your browser.
How to Log in to the 192.168.0.1 Router Admin Panel
It is a reliable and user-friendly method for accessing your router’s admin settings via 192.168.0.1. Here is the simple and easy step-by-step guide:
Step 1: Connect to the Router Network
Ensure that your device, such as a computer, laptop, mobile phone, or tablet, is connected to the router via Wi-Fi or an Ethernet cable. If you are not connected to the router’s network, then you will be unable to log in.
Step 2: Open a Web Browser
Begins with your favored web browser like Google Chrome, Firefox, Edge, Safari, etc.
Step 3: Enter the IP Address
Type the IP address http://192.168.0.1 in the web browser, and press Enter to go to the login page.
Note: Make sure to write the correct IP address, not type 192.168.0.1 (with the letter ‘o’); this is wrong and does not work.
Step 4: Enter Login Credentials
The display will show you the router’s login page. Now enter the default username and password admin/admin or password.
If you have not changed your login credentials before, it’s essential to do so after logging in to your page.
Step 5: Access the Admin Dashboard
After completing the login, you will enter the router’s admin panel. From here, you can configure and handle the network settings, which include:
- Wi-Fi name (SSID) and password
- Guest networks
- MAC address filtering
- Parental controls
- Port forwarding
- And other advanced settings
Check out our article on common router IP addresses to understand standard IPs used by most routers.
How to Secure Your WiFi: Update SSID and Password Through the 192.168.01 Admin Panel
Changing your Wi-Fi password or network name (SSID) via 192.168.0.1 is a quick and convenient process to enhance your network security and connection. If you want to change your Wi-Fi name or make a strong password, here are easy step-by-step instructions:
- Firstly, ensure your device is connected to a stable network by verifying it is linked to your Wi-Fi router.
- Launch any browser, such as Chrome, Firefox, Safari, etc.
- Type http://192.168.0.1 in the web browser address bar and press Enter.
- Log in to the admin panel and enter your router’s default username and password, which is typically admin/admin or the password provided by the manufacturer.
- When the admin dashboard opens, search for a tab labeled Wireless Settings or WiFi Settings, depending on your router’s brand.
- Find the SSID space and enter your new network name. Select a name that is easy to recognize, according to your choice.
- Look for the Wireless Password field and type your new, secure password, which should be strong and at least eight characters long, containing a mix of letters, numbers, and symbols.
- Tap Save to update your network settings. For a moment, your devices will be disconnected unless you log in with a new password. To configure your router settings, visit 10.0.0.0.1 piso wifi time for a complete guide.
Can't Access 192.168.0.1? Common Reasons and How to Fix Them
If you want to open the 192.168.0.1 web browser to access your router’s admin panel, and the site does not load. Don’t worry! We will provide you with the methods to resolve this issue. Many people face difficulty while connecting to the network or configuring settings. This IP address is usually used by routers such as TP-Link, D-Link, and NETGEAR, but if you can’t reach it, something is preventing the link between your device and the router.
1. Incorrect IP Address Entry
- Users sometimes mistype 192.168.o.1 (with the letter “o”) rather than 192.168.0.1 (with a zero).
- Continue to monitor and type the correct IP address, http://192.168.0.1, into your browser’s address bar.
2. Not Connected to the Router's Network
- If your device encounters an issue while connecting to the router’s Wi-Fi, you may be unable to access the IP.
- Ensures you are connected to the correct Wi-Fi or plugged in using a LAN cable before attempting to log in.
3. Router’s IP Address Is Different
- Issue: Some routers use 192.168.1.1, 192.168.100.1, or another IP instead of 192.168.0.1.
- On Windows, find the Default Gateway. On a Mac, go to System Preferences and select the Advanced option.
4. Browser Cache
- Your browser may be loading a cached version of the page.
- Clear your browser’s cache and cookies, or use private browsing mode. Try accessing 192.168.0.1 using an alternative web browser.
5. Router Is Not Working Properly
- If the router experiences a firmware glitch, it will be unable to respond to login attempts.
- Restart or reset the router settings.
Learn about default router logins to quickly access admin panels for various router brands.
Default Login Credentials for 192.168.0.1: Most Common Combinations
Default login details vary according to the router’s brand. To access the 192.168.0.1 admin panel, first, enter the default username and password if you have not changed them before. Below is a beneficial table showing the most commonly used default logins for 192.168.0.1, depending on individuals’ data and success rates. You might also find our guide for 192.168.100.1 useful to manage Huawei routers efficiently.
| Success rate | IP address | Username | Password |
| 43% | 192.168.0.1 | admin | admin |
| 20% | 192.168.0.1 | admin | password |
| 17% | 192.168.0.1 | – | admin |
| 7% | 192.168.0.1 | – | admin |
| 4% | 192.168.0.1 | admin | – |
Accessing Your TP-Link Router Admin Panel via 192.168.0.1
The TP-Link router is a popular brand. The IP address 192.168.0.1 serves as the gateway to access the admin panel, allowing you to manage network settings. TP-Link typically uses this private IP address to allow individuals to log in and manage Wi-Fi settings, change passwords, set up parental controls, manage connected devices, and adjust other settings.
To access your TP-Link router through 192.168.0.1, you must first enter a username and password to log in to the admin panel. Most TP-Link routers use default login information if you have not changed it manually before. The default usernames and passwords vary depending on the internet service provider. If you own a Tenda router, our tenda router guide will help you log in without issues.
How to Find Your TP-Link Router's IP Address on Any Device (OS-Specific Guide)
If the network administrator has changed the IP address of 192.168.0.1 on your TP-Link router, you can find it by using your device’s settings. Below are the easy-to-follow steps for each vital operating system:
1. Windows (All Versions)
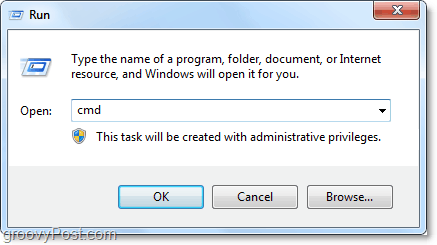
● Enter Windows + R on your keyboard to unlock the Run dialog.
● Type cmd and press Enter to open the Command Prompt.
● Type the following order and press Enter:
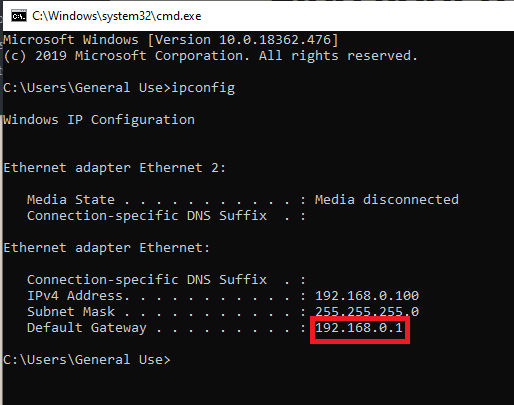
● Identify your LAN adapter, such as Wi-Fi or Ethernet.
● Look for the default IP address of your TP-Link router, typically 192.168.0.1 or 192.168.1.1.
2. macOS
◆ Tap the Apple icon in the top-left section and go to System Preferences.
◆ Select a network.
◆ Select your active connection (Wi-Fi or Ethernet) from the left panel.
◆ Press the Advanced option.
◆ Go to the TCP/IP tab.
◆ You will find the router’s IP address next to Router.
3. Chrome OS (Chromebook)
◆ Click the time in the lower right corner to open the network settings panel.
◆ Click the preference icon to open Settings.
◆ Go to Network and click your connected Wi-Fi.
◆ Tap the Network tab.
◆ Look for the default IP address; this is the address of your TP-Link router.
4. Linux
◆ Open the network settings.
◆ Type the command: ipconfig
◆ You’ll see the output.
◆ The IP address shown after this is your router’s IP address.
5. iOS (iPhone & iPad)
◆ Go to Settings > Wi-Fi.
◆ Tap the details icon next to your connected Wi-Fi network.
◆ Locate the Router space, which displays the IP address of a TP-Link router.
6. Android (Samsung, Google Pixel, etc.)
◆ Go to Settings > Network & Internet > Wi-Fi.
◆ Click your connected Wi-Fi network.
◆ Tap “Advanced settings” or “Details” (depending on your phone).
◆ Scroll to Gateway or Router; this is the IP address of your TP-Link router.
Note: Steps may vary slightly depending on the manufacturer and Android version.
For users of 10.10.10.1 routers, we have a step-by-step tutorial on pausing Wi-Fi and admin login.
Having Trouble Accessing Your TP-Link Router Settings?
If you find it tricky to configure your router via tplinkwifi.net, it means your device isn’t currently connected to the TP-Link router’s network. Firstly, ensure that your device is connected to the router’s Wi-Fi. There are some simple solutions to resolve your problem:
Clear Your Browser Cache or Try Another Browser
If the saved version of the login page exists, it automatically loads it, which is incorrect sometimes. So, here’s how to fix it:
✦ Clear your browser’s cache, cookies, and saved history.
✦ Then, try accessing http://tplinkwifi.net in a web browser again.
✦ Use a different browser, such as Chrome, Edge, or Firefox.
Use the Router's IP Address Instead
If tplinkwifi.net remains unprocessed, try logging in with the router’s local IP address:
✦ http://192.168.0.1
✦ http://192.168.1.1
If you’re using an Aginet Mesh device from TP-Link, use this instead:
✦ http://192.168.88.1
Connecting directly to your TP-Link router via a wired Ethernet cable is the easiest method for setting up or resolving issues.
Configure Using the TP-Link Mobile App
TP-Link Tether App (for TP-Link routers):
✦ Install the TP-Link Tether App from the Google Play Store or Apple App Store.
✦ Open the app and grant the necessary permissions to continue.
✦ The app will automatically detect your TP-Link device; click to handle settings such as Wi-Fi name, password, parental control, and more.
TP-Link Aginet App (for Aginet-branded routers):
✦ Download the TP-Link Aginet App from your app store.
✦ Open the app and find the nearby Aginet devices.
✦ Click your router once it is detected to handle settings and configure it easily.
Ensure You're on the Correct Network
Sometimes, individuals try to access the router settings while connected to another Wi-Fi network or mobile data. Therefore, it’s essential to examine it. You’re connected to your TP-Link Wi-Fi network.
✦ If using a phone, turn off your mobile data.
✦ Disconnect any VPN if it is active; it will cause an issue with the local connection.
Disable Firewall or Antivirus Temporarily
Some third-party antivirus or firewall programs block access to router admin pages:
✦ Turning off your firewall or antivirus software for some time.
✦ Refresh the page and try reaccessing http://192.168.0.1 or http://tplinkwifi.net.
Make sure your security software is enabled after accessing the settings.
Restart Your Router and Device
Restarting your device will solve the network connection glitch.
✦ Restart your device, like a computer, laptop, or phone.
✦ After reconnecting to Wi-Fi, try reaccessing the homepage.
Our guide on pldt login explains how to access and configure PLDT routers.
192.168.0.1 Common IP Address Used by NETGEAR and D-Link Routers
The IP address 192.168.0.1 is the default gateway used by many famous router brands, such as NETGEAR and D-Link, to access their web-based setup pages. Firstly, check for a stable connection between the device and the router. After this, enter the IP address 109.168.0.1 into your web browser. It takes you to the homepage, where you can manage Wi-Fi settings, security features, and control devices; update firmware; and help to deal with troubleshooting issues.
This IP address is part of the private IP range initially assigned by the Internet Assigned Numbers Authority (IANA), which means it does not travel on the public internet. It deals with the internal address of your router, allowing you to communicate with the device for personalized settings and control the overall network. When using a NETGEAR or D-Link router, you have numerous options to manage and configure various settings, including Wi-Fi name and parental controls.
192.168.0.1 Tenda Router Login: Access and Manage Your Network Easily
To access the admin panel through 192.168.0.1 using a Tenda router, this is the private IP address that allows you to control and manage all network settings. It includes changing your Wi-Fi password, changing the network name, enabling parental controls, handling connected devices, and enhancing overall security. To continue and reach the home page, ensure you have a stable Tenda router connection.
How to Log In to Your Tenda Router Using 192.168.0.1
Accessing your Tenda router’s admin panel is a straightforward and reliable process that takes only a few moments. Follow these step-by-step instructions:
Step-by-Step Login Guide for Tenda Router:
Connect to Your Tenda Network
Ensure your device is connected to the Tenda Wi-Fi network or via an Ethernet cable.
Open a Web Browser
Use any preferred browser, such as Chrome, Firefox, Edge, or Safari.
Enter the IP Address
Type http://192.168.0.1 in the web browser address bar and tap Enter.
The login page appears.
Here you will see the Tenda router login page.
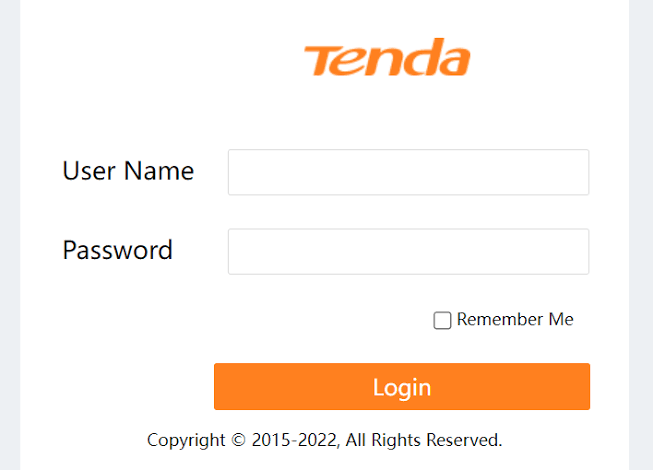
Enter Username and Password
According to default settings, Tenda uses:
✎ Username: admin
✎ Password: admin
If this was not helpful and caused an error, check the label on the back of your router or reset it to default settings.
Press Enter
After entering the login details, tap the Login button to access the admin dashboard.
Try using a different browser if your Tenda router browser does not load.
Learn more about 192.168.1.254 to access your router’s admin panel and resolve common issues.
How to Change Tenda Router Wi-Fi Name (SSID) and Password
It is beneficial to change your Tenda router’s Wi-Fi name (SSID) and password to protect your account and personal information from any unauthorized access. Here are the simple steps:
Change Wi-Fi Name (SSID):
➼ Go to the Tenda router web browser http://192.168.0.1 and enter the default username and password (usually admin/admin).
➼ Go to the wireless or WiFi tab from the homepage.
➼ Find the SSID space and enter a new Wi-Fi name.
➼ Choose a new name that reflects your preferred choice and helps you easily identify your network.
➼ Tap “Save” to confirm changes. Your network name will be changed.
Now, you need to reconnect the devices using the new Wi-Fi name.
Change Tenda Router Wi-Fi Password
➼ Open http://192.168.0.1 in a web browser and log in with admin credentials.
➼ Go to “Wireless” > “Security Settings.”
➼ Locate the Password Field; from here, you can change it.
➼ Enter your new Wi-Fi password, which is a combination of letters, numbers, and symbols.
➼ Click Apply; this may cause some routers to reboot automatically.
After this, reconnect all your devices using the new password details.
If you’re using 192.168.8.1 admin login, this article will help you solve login problems quickly.
FAQs
Log in to your router at http://192.168.0.1, navigate to Wireless Settings, and update your Wi-Fi password. Save the changes and reconnect your devices.
Connect to your router network, launch a browser, and enter 192.168.0.1. Use the default login information to access router settings.
If you’re unable to open the 192.168.0.1 web browser, ensure your device is connected to the router’s network. Clear your browser cache and cookies, or try using a different browser.
This could be due to invalid wifi settings or loose cables. Recheck your ISP connection and ensure all wires are safely plugged in.
Firstly, log in to the admin panel, navigate to WiFi settings, and update the IP address. Save changes and try logging in again by using the new IP.